How to create a target account list
Step 1: Navigate to the Accounts Builder
In the left navigation menu, click Segmentation.
From the submenu, click Accounts.
This opens the Account Builder where you can define the rules that make up your account target list.
Step 2: Name Your Account List
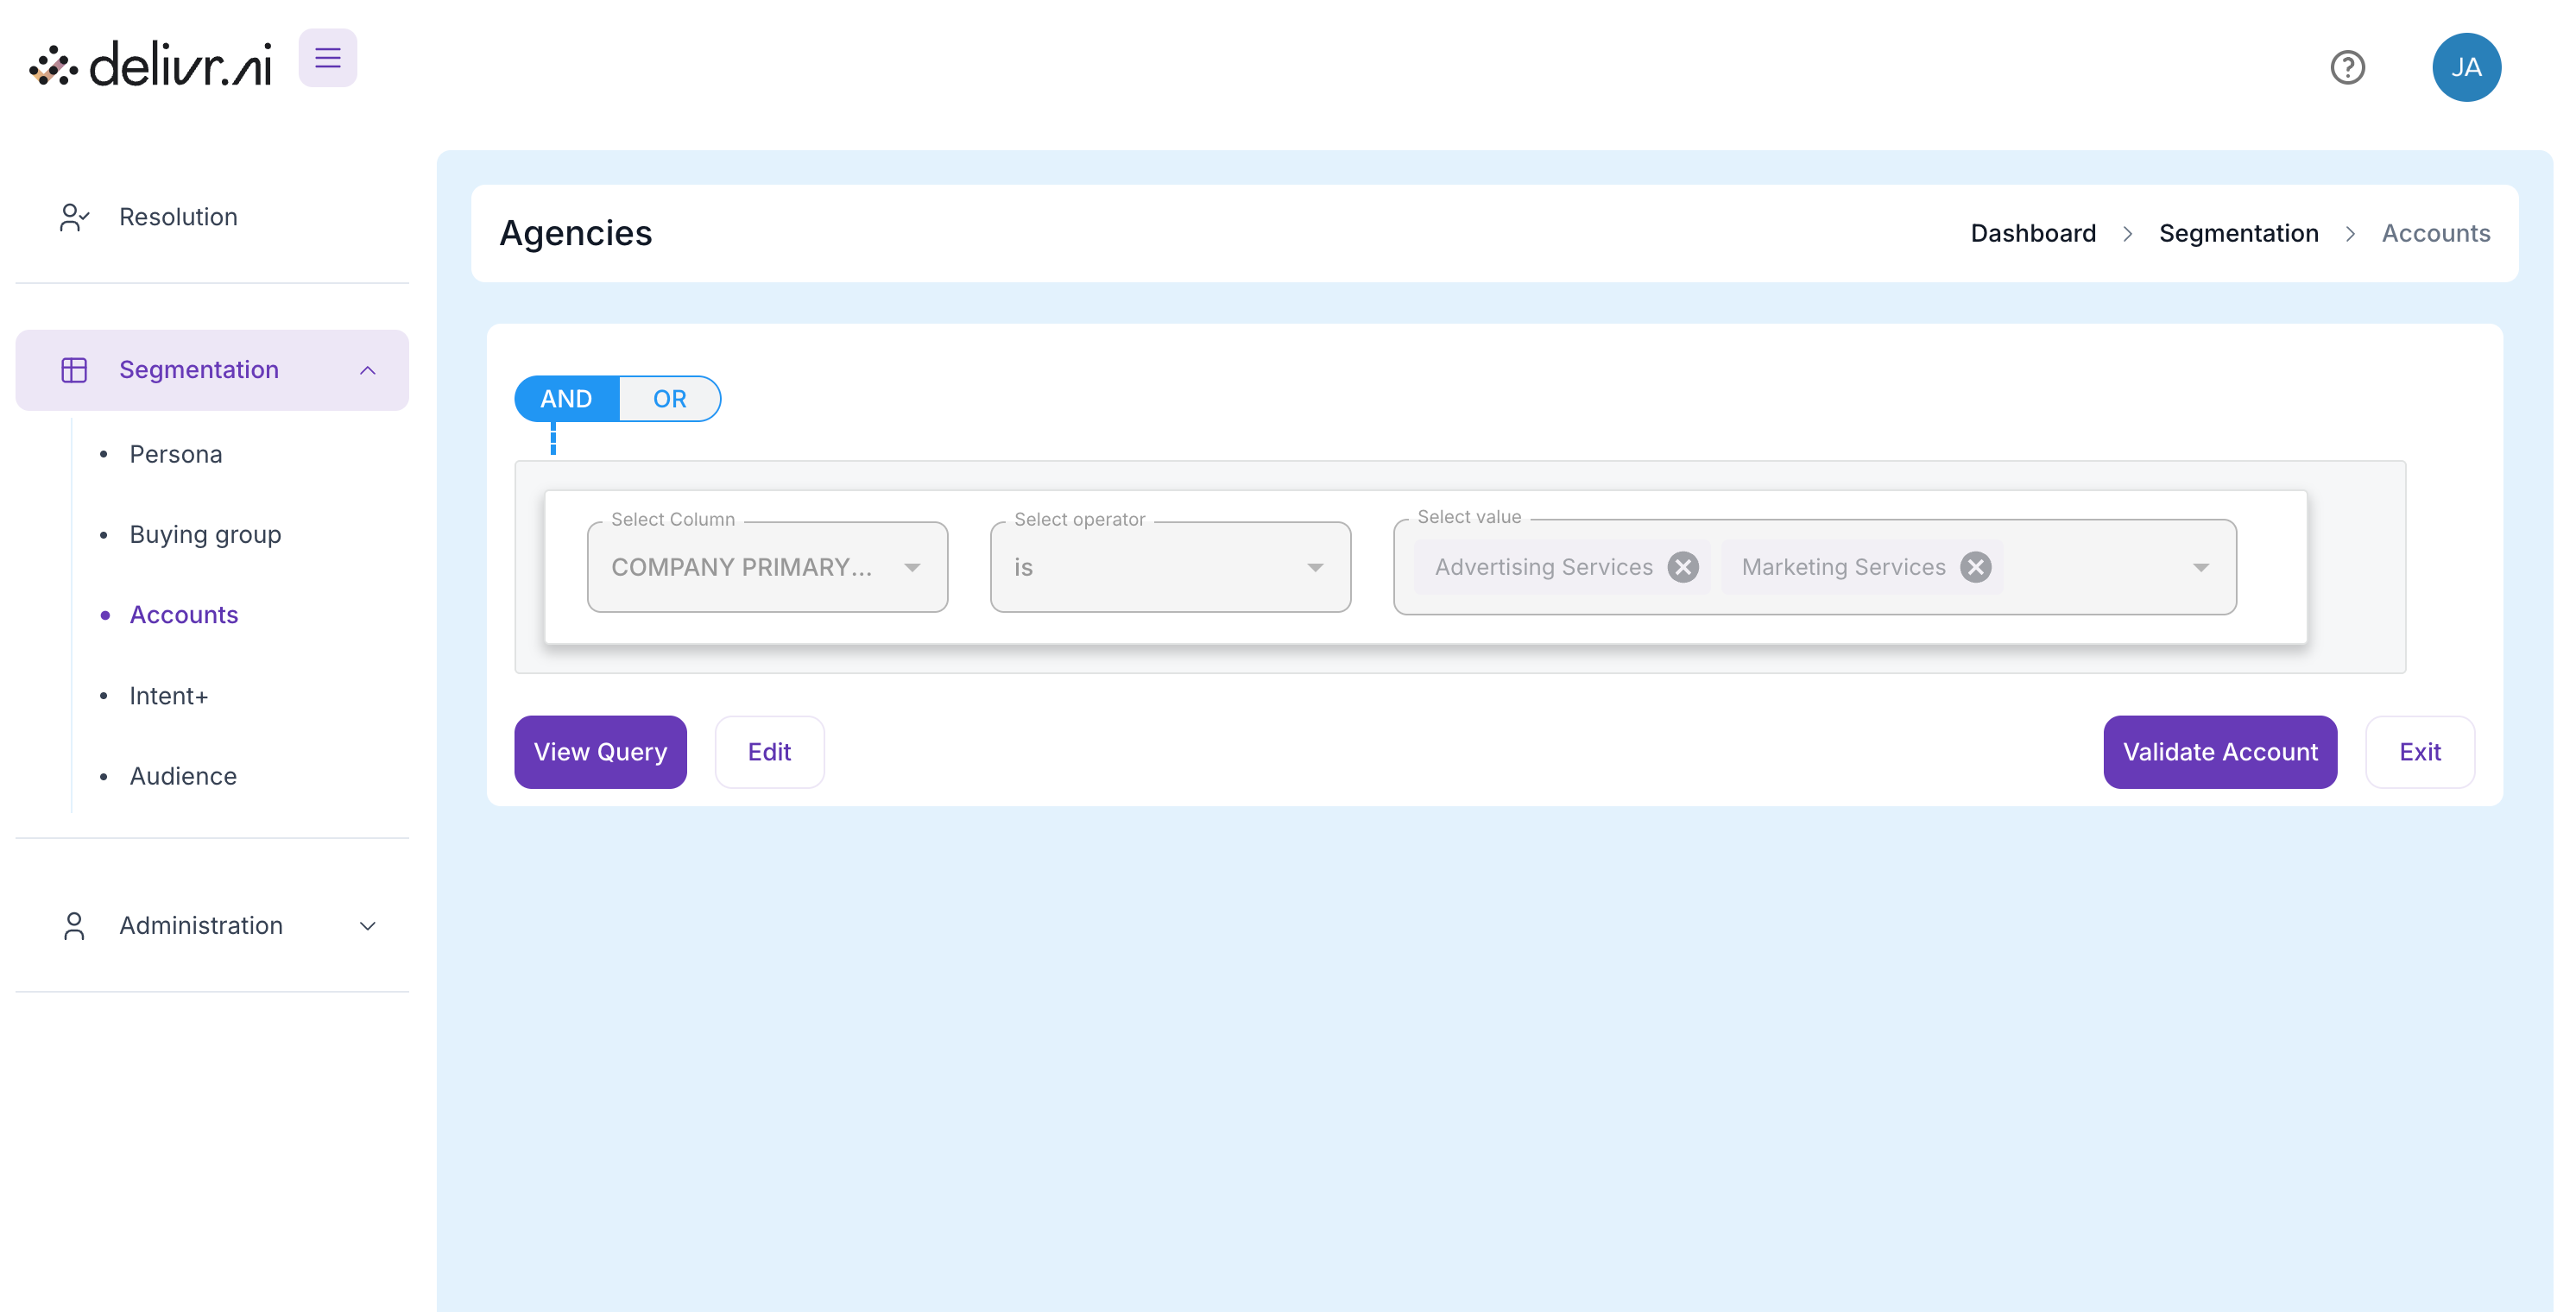
At the top, enter a descriptive name for your list (examples: “Agencies,” “Demand Agency List 6.10.25”).
Purpose: This name will help you and your team recognize the purpose of the account list later when using it in campaigns, dashboards, or reports.
Best practice: Include a segment description (industry, vertical, region) or date to keep versions organized.
Step 3: Add Conditions
Conditions define which accounts belong in your list.
Select Column
What it does: Lets you choose the attribute to filter by. Options include:
COMPANY NAME – target by company name
COMPANY DOMAIN – match specific websites/domains (or upload a domain list file)
COMPANY SIC / Industry – filter by industry classification (e.g., “Advertising Services”)
COMPANY LOCATION – narrow to city, state, or country
COMPANY SIZE, REVENUE – filter by size or revenue bands if available
Select Operator
What it does: Defines the comparison logic. Examples:
is / equals – exact match
contains / starts with – partial match
is not null – include only accounts where this field is populated
Select Value
What it does: Enter or select the value you want to match.
Can be a typed value (e.g., “Advertising Services”)
Can be an uploaded file (e.g., “Demand Agency Prospecting List.csv”) for bulk matching by domain or company name.
Step 4: Add Multiple Conditions or Groups
+ Add condition
Function: Adds another filter row within the same group.
Example:
Condition 1:
COMPANY SIC is Advertising ServicesCondition 2:
COMPANY COUNTRY is United States
This would include only agencies in the U.S.
+ Add group
Function: Creates a nested logic group where you can apply separate AND/OR logic to a second set of conditions.
Step 5: Choose AND / OR Logic
At the top of the condition block, toggle between AND and OR:
AND: All conditions must be true for an account to match.
OR: Only one of the conditions needs to be true.
Example:
AND → Company must be in Advertising Services and located in the U.S.
OR → Company can be in Advertising Services or Marketing Services.
Step 6: Upload a CSV (Optional)

If you have a curated list of company domains or names, you can:
Select
COMPANY DOMAINas your columnChoose
isUpload your CSV file with domains in the value field
This is ideal for building custom named-account lists (ABM programs).
Step 7: View or Validate Your List
At the bottom right you have two important buttons:
View Query:
Displays the underlying query logic in a preview format, so you can verify that your filters are structured as expected.Validate Account:
Runs the rules and shows the number of matching accounts in real time.Ensures your segment isn’t too small or too broad before you save.
Step 8: Save or Exit
Save: Commits the account list to your database so it can be used in campaigns, audiences, and reports.
Exit: Leaves the builder without saving changes.